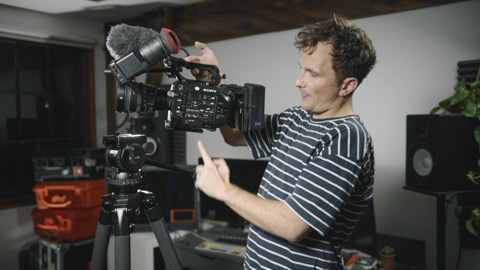
Recently Wex Photo Video - the UK’s leading photography and video store, asked me to make a film about getting the most out of a fluid head tripod. As a professional cameraman with over a decades worth of experience, it put me in a good position to do so. I thought I’d write this up into a blog to help anyone else out there getting to grips with grip.
Setting up a tripod
To start, work out what you want the composition of your image to be. I often do this handheld to start with. Find the correct angle and height. This might include a bit of foreground or some parallel lines.
Legs
Next get your tripod in place. Set the height of the legs. I like to work from the bottom stage up on multistage tripods. This means that you won’t have to awkwardly tilt the tripod one leg at a time if you need to get up further later on.
Level
Next up you want to level your tripod head bowl to ensure that it’s horizontal. This will give you a stable base and also ensure that your pans are dead horizontal.
Balance
You now want to attached the camera to the tripod and ensure that it’s balanced with the centre of gravity dead centre on the tripod head. To do this, you can dangle the camera from the handle on one finger to find where the centre is. Once you’ve attached the camera to the tripod, you then want to ensure that this is the point that is centre on the tripod head. To test, you can set the drag and the counter balance down to zero, and the camera should stay fairly level.
Counter Balance
You’re now ready to set the counter balance. The point of the counter balance is to take the weight of the camera so there should be zero force on the tripod head itself. The counter balance in the head is made up of a series of springs which work with the head to take the weight of the camera.
Once properly set, the you should be able to release all the drag and the tilt axis should stay put on the tripod head. It does take a bit of too’ing and fro’ing to ensure that the camera is dead centre and not offset for this to work, but when it is, it will up your tripod game.
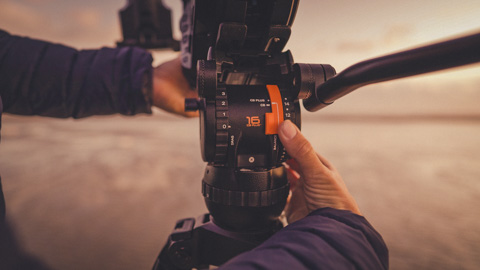
Drag
The next phase is setting the drag. This is very much down to personal taste really, but you want it to keep the camera steady whilst tilting or panning. A true fluid head gets its name from using fluid filled chambers which offer the resistance. Cheaper tripod heads often don’t do this. They’ll use a friction pad to offer resistance which as it wears can become juddery and not very accurate. Premium fluid heads from the likes of Miller or Sachtler will last indefinitely and be a much wiser investment. On a shoot, you need to use the right tool for the job. Cheap tripods inevitably aren’t true fluid heads and at the end of the day, you’ll end-up with sub par footage which doesn’t look smooth.
In terms of the amount of drag to use, if I’m doing a long slow move, I may use a fair bit of resistance. If I’m filming something like a sports event, I’ll use very little to ensure I have the fastest response time possible to the action.

Lock
We then move on to the lock. This is to lock-off your tripod when you’re not performing a move. This shouldn’t be used to add in additional drag, but more to stop that particular axis moving. Often when I’m performing a tilt, I like to lock off the pan axis to ensure I stay dead horizontal.
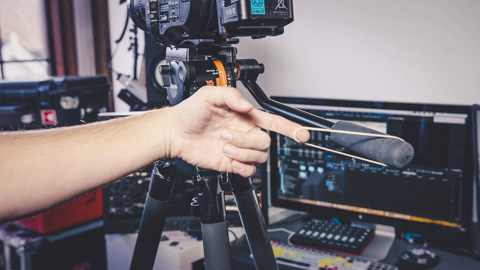
Pan Handle
Finally we have the pan-handle. The position of this really is down to personal preference. I like to find a suitable position which doesn’t feel awkward and gives me the maximum mobility. I’ll often adjust the position, depending one what move I’m doing.
I then like to use a very light hold, maybe two fingers and thumb if I can, to ensure that as little of my body vibrations make it’s way down onto the camera.

Tips & Tricks
I now going share a couple of tips and tricks to help get the most out of your tripod.
The whole point of using a tripod, is to capture movements as smoothly and as stable as possible. You’re looking to capture something that can’t be captured handheld. You really want to focus on slowing things down and smoothing them out.
Whilst learning how to use a tripod smoothly, particularly if it is a cheeper model, rubber bands can be really helpful. Pop one end around the pan handle and the other around your finger, and then as you drag the pan handle around, you’ll find the rubber band acts as a shock absorber, lessening the judders.
When you go to film your particular move, start by practising it first. Find your start point and your end point, practise going from one to another and then record. Capture a few second in your start location, smoothly move to your end location and then hold there from anywhere between 5-10 seconds. Editors will always thank you for giving them a bit more to work with!
It’s also worth thinking about what type of shot you’re actually after and how you see it fitting into an edit. Is it a reveal, a slow pan showing detail or is it whip pan transition? I’d also advise practising these as much as you can. Get used to how it feels and how you can incorporate each one into your work.
If you find the tripod moves about as you’re doing a camera move, weight it down with some sandbags or a kit bag.
And always lock your tripod off when you’re not using it, to make sure it doesn’t tilt back or forwards when you’re not looking.
Finally, just a note about packing away. To maximise the longevity of your tripod, release all the locks and set the drag and counter balance down to 0. This then means that if you were to drop your tripod, which happens regularly on my shoots, you’re less likely to damage the internal components. It’s good to occasionally brush or air blow your tripods and wipe away any moisture before packing away. If you follow that, your tripod is more likely to survive a long a prosperous career!
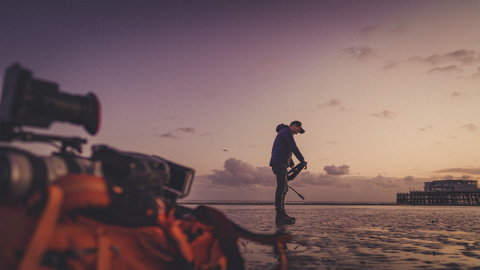
You can watch the full film here:
Big thanks to Alan Stockdale of Foundlight Films for the awesome sunset shots!