One of my biggest gripes with creating graphics in Premiere Pro and animating them, is that there’s currently no way to add motion blur. Motion blur adds a subtle but professional feel to moving graphics, that don’t jar with the person watching them. Usually I’d whip over to After Effects, dynamically link a composition and let After Effects do the work. However, sometimes I’m just looking for a quick fix or co-working on a project with non-AE users.
This trick only really works for reveals such as the bottom, solid layer of a lower-third title.
- Create a new title in the project and label it lower-third matt.
- Put in place in your sequence and open up the Title tool.
- Create your desired shape using the Rectangle Tool (or other shape tool), select the fill colour/opacity and close down the title tool.
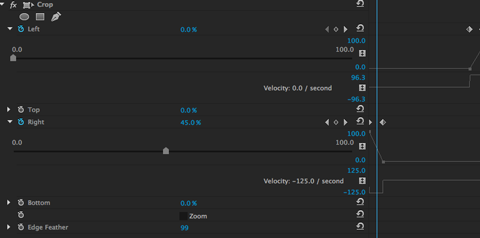
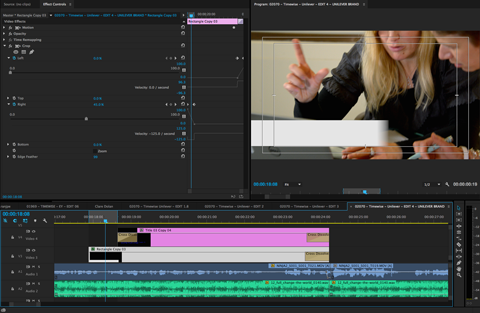
- Now add the “Crop” effect from the Effects panel to the title.
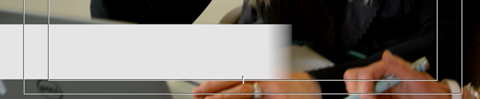
- Using the Effect Controls, at the beginning of the animation, keyframe in the reveal to reveal the shape. Make sure that you over compensate and ensure that you’re at least 100 pixels beyond the edge of the shape.
- It’s not essential but you can right click the finishing keyframe and select ‘Bezier’ to smooth out the transition.
- The key step is to now dial in the ‘Edge Feather’ on the Crop effect. Something like 100 should be sufficient. As the crop reveals, this is going to add a faux motion blur to it.
- Now using a separate title, you can add the text in above the shape layer and fade in.